Shadows
This article is part of a series of articles about three.js. The first article is three.js fundamentals. If you haven't read that yet and you're new to three.js you might want to consider starting there. The previous article was about cameras which is important to have read before you read this article as well as the article before that one about lights.
Shadows on computers can be a complicated topic. There are various solutions and all of them have tradeoffs including the solutions available in three.js.
Three.js by default uses shadow maps. The way a shadow map works is, for every light that casts shadows all objects marked to cast shadows are rendered from the point of view of the light. READ THAT AGAIN! and let it sink in.
In other words, if you have 20 objects, and 5 lights, and all 20 objects are casting shadows and all 5 lights are casting shadows then your entire scene will be drawn 6 times. All 20 objects will be drawn for light #1, then all 20 objects will be drawn for light #2, then #3, etc and finally the actual scene will be drawn using data from the first 5 renders.
It gets worse, if you have a point light casting shadows the scene has to be drawn 6 times just for that light!
For these reasons it's common to find other solutions than to have a bunch of lights all generating shadows. One common solution is to have multiple lights but only one directional light generating shadows.
Yet another solution is to use lightmaps and or ambient occlusion maps to pre-compute the effects of lighting offline. This results in static lighting or static lighting hints but at least it's fast. We'll cover both of those in another article.
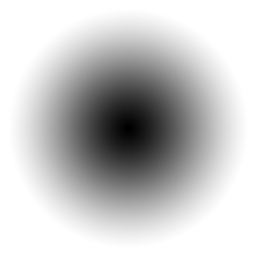
Another solution is to use fake shadows. Make a plane, put a grayscale texture in the plane that approximates a shadow, draw it above the ground below your object.
For example let's use this texture as a fake shadow
We'll use some of the code from the previous article.
Let's set the background color to white.
const scene = new THREE.Scene();
+scene.background = new THREE.Color('white');
Then we'll setup the same checkerboard ground but this time it's using
a MeshBasicMaterial as we don't need lighting for the ground.
+const loader = new THREE.TextureLoader();

{
  const planeSize = 40;

-  const loader = new THREE.TextureLoader();
  const texture = loader.load('resources/images/checker.png');
  texture.wrapS = THREE.RepeatWrapping;
  texture.wrapT = THREE.RepeatWrapping;
  texture.magFilter = THREE.NearestFilter;
  const repeats = planeSize / 2;
  texture.repeat.set(repeats, repeats);

  const planeGeo = new THREE.PlaneGeometry(planeSize, planeSize);
  const planeMat = new THREE.MeshBasicMaterial({
    map: texture,
    side: THREE.DoubleSide,
  });
+  planeMat.color.setRGB(1.5, 1.5, 1.5);
  const mesh = new THREE.Mesh(planeGeo, planeMat);
  mesh.rotation.x = Math.PI * -.5;
  scene.add(mesh);
}
Note we're setting the color to 1.5, 1.5, 1.5. This will multiply the checkerboard
texture's colors by 1.5, 1.5, 1.5. Since the texture's colors are 0x808080 and 0xC0C0C0
which is medium gray and light gray, multiplying them by 1.5 will give us a white and
light grey checkerboard.
Let's load the shadow texture
const shadowTexture = loader.load('resources/images/roundshadow.png');
and make an array to remember each sphere and associated objects.
const sphereShadowBases = [];
Then we'll make a sphere geometry
const sphereRadius = 1;
const sphereWidthDivisions = 32;
const sphereHeightDivisions = 16;
const sphereGeo = new THREE.SphereGeometry(sphereRadius, sphereWidthDivisions, sphereHeightDivisions);
And a plane geometry for the fake shadow
const planeSize = 1;
const shadowGeo = new THREE.PlaneGeometry(planeSize, planeSize);
Now we'll make a bunch of spheres. For each sphere we'll create a base
THREE.Object3D and we'll make both the shadow plane mesh and the sphere mesh
children of the base. That way if we move the base both the sphere and the shadow
will move. We need to put the shadow slightly above the ground to prevent z-fighting.
We also set depthWrite to false so that the shadows don't mess each other up.
We'll go over both of these issues in another article.
The shadow is a MeshBasicMaterial because it doesn't need lighting.
We make each sphere a different hue and then save off the base, the sphere mesh, the shadow mesh and the initial y position of each sphere.
const numSpheres = 15;
for (let i = 0; i < numSpheres; ++i) {
  // make a base for the shadow and the sphere
  // so they move together.
  const base = new THREE.Object3D();
  scene.add(base);

  // add the shadow to the base
  // note: we make a new material for each sphere
  // so we can set that sphere's material transparency
  // separately.
  const shadowMat = new THREE.MeshBasicMaterial({
    map: shadowTexture,
    transparent: true,    // so we can see the ground
    depthWrite: false,    // so we don't have to sort
  });
  const shadowMesh = new THREE.Mesh(shadowGeo, shadowMat);
  shadowMesh.position.y = 0.001;  // so we're above the ground slightly
  shadowMesh.rotation.x = Math.PI * -.5;
  const shadowSize = sphereRadius * 4;
  shadowMesh.scale.set(shadowSize, shadowSize, shadowSize);
  base.add(shadowMesh);

  // add the sphere to the base
  const u = i / numSpheres;   // goes from 0 to 1 as we iterate the spheres.
  const sphereMat = new THREE.MeshPhongMaterial();
  sphereMat.color.setHSL(u, 1, .75);
  const sphereMesh = new THREE.Mesh(sphereGeo, sphereMat);
  sphereMesh.position.set(0, sphereRadius + 2, 0);
  base.add(sphereMesh);

  // remember all 3 plus the y position
  sphereShadowBases.push({base, sphereMesh, shadowMesh, y: sphereMesh.position.y});
}
We setup 2 lights. One is a HemisphereLight with the intensity set to 2 to really
brighten things up.
{
  const skyColor = 0xB1E1FF;  // light blue
  const groundColor = 0xB97A20;  // brownish orange
  const intensity = 2;
  const light = new THREE.HemisphereLight(skyColor, groundColor, intensity);
  scene.add(light);
}
The other is a DirectionalLight so the spheres get some definition
{
  const color = 0xFFFFFF;
  const intensity = 1;
  const light = new THREE.DirectionalLight(color, intensity);
  light.position.set(0, 10, 5);
  light.target.position.set(-5, 0, 0);
  scene.add(light);
  scene.add(light.target);
}
It would render as is but let's animate there spheres.
For each sphere, shadow, base set we move the base in the xz plane, we
move the sphere up and down using Math.abs(Math.sin(time))
which gives us a bouncy animation. And, we also set the shadow material's
opacity so that as each sphere goes higher its shadow fades out.
function render(time) {
  time *= 0.001;  // convert to seconds

  ...

  sphereShadowBases.forEach((sphereShadowBase, ndx) => {
    const {base, sphereMesh, shadowMesh, y} = sphereShadowBase;

    // u is a value that goes from 0 to 1 as we iterate the spheres
    const u = ndx / sphereShadowBases.length;

    // compute a position for the base. This will move
    // both the sphere and its shadow
    const speed = time * .2;
    const angle = speed + u * Math.PI * 2 * (ndx % 1 ? 1 : -1);
    const radius = Math.sin(speed - ndx) * 10;
    base.position.set(Math.cos(angle) * radius, 0, Math.sin(angle) * radius);

    // yOff is a value that goes from 0 to 1
    const yOff = Math.abs(Math.sin(time * 2 + ndx));
    // move the sphere up and down
    sphereMesh.position.y = y + THREE.MathUtils.lerp(-2, 2, yOff);
    // fade the shadow as the sphere goes up
    shadowMesh.material.opacity = THREE.MathUtils.lerp(1, .25, yOff);
  });

  ...
And here's 15 kind of bouncing balls.
In some apps it's common to use a round or oval shadow for everything but of course you could also use different shaped shadow textures. You might also give the shadow a harder edge. A good example of using this type of shadow is Animal Crossing Pocket Camp where you can see each character has a simple round shadow. It's effective and cheap. Monument Valley appears to also use this kind of shadow for the main character.
So, moving on to shadow maps, there are 3 lights which can cast shadows. The DirectionalLight,
the PointLight, and the SpotLight.
Let's start with the DirectionalLight with the helper example from the lights article.
The first thing we need to do is turn on shadows in the renderer.
const renderer = new THREE.WebGLRenderer({antialias: true, canvas});
+renderer.shadowMap.enabled = true;
Then we also need to tell the light to cast a shadow
const light = new THREE.DirectionalLight(color, intensity);
+light.castShadow = true;
We also need to go to each mesh in the scene and decide if it should both cast shadows and/or receive shadows.
Let's make the plane (the ground) only receive shadows since we don't really care what happens underneath.
const mesh = new THREE.Mesh(planeGeo, planeMat);
mesh.receiveShadow = true;
For the cube and the sphere let's have them both receive and cast shadows
const mesh = new THREE.Mesh(cubeGeo, cubeMat);
mesh.castShadow = true;
mesh.receiveShadow = true;

...

const mesh = new THREE.Mesh(sphereGeo, sphereMat);
mesh.castShadow = true;
mesh.receiveShadow = true;
And then we run it.
What happened? Why are parts of the shadows missing?
The reason is shadow maps are created by rendering the scene from the point
of view of the light. In this case there is a camera at the DirectionalLight
that is looking at its target. Just like the camera's we previously covered
the light's shadow camera defines an area inside of which
the shadows get rendered. In the example above that area is too small.
In order to visualize that area we can get the light's shadow camera and add
a CameraHelper to the scene.
const cameraHelper = new THREE.CameraHelper(light.shadow.camera);
scene.add(cameraHelper);
And now you can see the area for which shadows are cast and received.
Adjust the target x value back and forth and it should be pretty clear that only what's inside the light's shadow camera box is where shadows are drawn.
We can adjust the size of that box by adjusting the light's shadow camera.
Let's add some GUI setting to adjust the light's shadow camera box. Since a
DirectionalLight represents light all going in a parallel direction, the
DirectionalLight uses an OrthographicCamera for its shadow camera.
We went over how an OrthographicCamera works in the previous article about cameras.
Recall an OrthographicCamera defines
its box or view frustum by its left, right, top, bottom, near, far,
and zoom properties.
Again let's make a helper class for the lil-gui. We'll make a DimensionGUIHelper
that we'll pass an object and 2 properties. It will present one property that lil-gui
can adjust and in response will set the two properties one positive and one negative.
We can use this to set left and right as width and up and down as height.
class DimensionGUIHelper {
  constructor(obj, minProp, maxProp) {
    this.obj = obj;
    this.minProp = minProp;
    this.maxProp = maxProp;
  }
  get value() {
    return this.obj[this.maxProp] * 2;
  }
  set value(v) {
    this.obj[this.maxProp] = v /  2;
    this.obj[this.minProp] = v / -2;
  }
}
We'll also use the MinMaxGUIHelper we created in the camera article
to adjust near and far.
const gui = new GUI();
gui.addColor(new ColorGUIHelper(light, 'color'), 'value').name('color');
gui.add(light, 'intensity', 0, 2, 0.01);
+{
+  const folder = gui.addFolder('Shadow Camera');
+  folder.open();
+  folder.add(new DimensionGUIHelper(light.shadow.camera, 'left', 'right'), 'value', 1, 100)
+    .name('width')
+    .onChange(updateCamera);
+  folder.add(new DimensionGUIHelper(light.shadow.camera, 'bottom', 'top'), 'value', 1, 100)
+    .name('height')
+    .onChange(updateCamera);
+  const minMaxGUIHelper = new MinMaxGUIHelper(light.shadow.camera, 'near', 'far', 0.1);
+  folder.add(minMaxGUIHelper, 'min', 0.1, 50, 0.1).name('near').onChange(updateCamera);
+  folder.add(minMaxGUIHelper, 'max', 0.1, 50, 0.1).name('far').onChange(updateCamera);
+  folder.add(light.shadow.camera, 'zoom', 0.01, 1.5, 0.01).onChange(updateCamera);
+}
We tell the GUI to call our updateCamera function anytime anything changes.
Let's write that function to update the light, the helper for the light, the
light's shadow camera, and the helper showing the light's shadow camera.
function updateCamera() {
  // update the light target's matrixWorld because it's needed by the helper
  light.target.updateMatrixWorld();
  helper.update();
  // update the light's shadow camera's projection matrix
  light.shadow.camera.updateProjectionMatrix();
  // and now update the camera helper we're using to show the light's shadow camera
  cameraHelper.update();
}
updateCamera();
And now that we've given the light's shadow camera a GUI we can play with the values.
Set the width and height to about 30 and you can see the shadows are correct
and the areas that need to be in shadow for this scene are entirely covered.
But this brings up the question, why not just set width and height to some
giant numbers to just cover everything? Set the width and height to 100
and you might see something like this
What's going on with these low-res shadows?!
This issue is yet another shadow related setting to be aware of. Shadow maps are textures the shadows get drawn into. Those textures have a size. The shadow camera's area we set above is stretched across that size. That means the larger area you set, the more blocky your shadows will be.
You can set the resolution of the shadow map's texture by setting light.shadow.mapSize.width
and light.shadow.mapSize.height. They default to 512x512.
The larger you make them the more memory they take and the slower they are to compute so you want
to set them as small as you can and still make your scene work. The same is true with the
light's shadow camera area. Smaller means better looking shadows so make the area as small as you
can and still cover your scene. Be aware that each user's machine has a maximum texture size
allowed which is available on the renderer as renderer.capabilities.maxTextureSize.
Switching to the SpotLight the light's shadow camera becomes a PerspectiveCamera. Unlike the DirectionalLight's shadow camera
where we could manually set most its settings, SpotLight's shadow camera is controlled by the SpotLight itself. The fov for the shadow
camera is directly connected to the SpotLight's angle setting.
The aspect is set automatically based on the size of the shadow map.
-const light = new THREE.DirectionalLight(color, intensity);
+const light = new THREE.SpotLight(color, intensity);
and we added back in the penumbra and angle settings
from our article about lights.
And finally there's shadows with a PointLight. Since a PointLight
shines in all directions the only relevant settings are near and far.
Otherwise the PointLight shadow is effectively 6 SpotLight shadows
each one pointing to the face of a cube around the light. This means
PointLight shadows are much slower since the entire scene must be
drawn 6 times, one for each direction.
Let's put a box around our scene so we can see shadows on the walls
and ceiling. We'll set the material's side property to THREE.BackSide
so we render the inside of the box instead of the outside. Like the floor
we'll set it only to receive shadows. Also we'll set the position of the
box so its bottom is slightly below the floor so the floor and the bottom
of the box don't z-fight.
{
  const cubeSize = 30;
  const cubeGeo = new THREE.BoxGeometry(cubeSize, cubeSize, cubeSize);
  const cubeMat = new THREE.MeshPhongMaterial({
    color: '#CCC',
    side: THREE.BackSide,
  });
  const mesh = new THREE.Mesh(cubeGeo, cubeMat);
  mesh.receiveShadow = true;
  mesh.position.set(0, cubeSize / 2 - 0.1, 0);
  scene.add(mesh);
}
And of course we need to switch the light to a PointLight.
-const light = new THREE.SpotLight(color, intensity);
+const light = new THREE.PointLight(color, intensity);

....

// so we can easily see where the point light is
+const helper = new THREE.PointLightHelper(light);
+scene.add(helper);
Use the position GUI settings to move the light around
and you'll see the shadows fall on all the walls. You can
also adjust near and far settings and see just like
the other shadows when things are closer than near they
no longer receive a shadow and they are further than far
they are always in shadow.