Multiple Canvases Multiple Scenes
A common question is how to use THREE.js with multiple canvases.
Let's say you want to make an e-commerce site or you want to make
a page with lots of 3D diagrams. At first glance it appears easy.
Just make a canvas every where you want a diagram. For each canvas
make a Renderer.
You'll quickly find though that you run into problems.
The browser limits how many WebGL contexts you can have.
Typically that limit is around 8 of them. As soon as you create the 9th context the oldest one will be lost.
WebGL resources can not be shared across contexts
That means if you want to load a 10 meg model into 2 canvases and that model uses 20 meg of textures your 10 meg model will have to be loaded twice and your textures will also be loaded twice. Nothing can be shared across contexts. This also means things have to be initialized twice, shaders compiled twice, etc. It gets worse as there are more canvases.
So what's the solution?
The solution is one canvas that fills the viewport in the background and some other element to represent each "virtual" canvas. We make a single Renderer and then one Scene for each virtual canvas. We'll then check the positions of the virtual canvas elements and if they are on the screen we'll tell THREE.js to draw their scene at the correct place.
With this solution there is only 1 canvas so we solve both problem 1 and 2 above. We won't run into the WebGL context limit because we will only be using one context. We also won't run into the sharing issues for the same reasons.
Let's start with a simple example with just 2 scenes. First we'll make the HTML
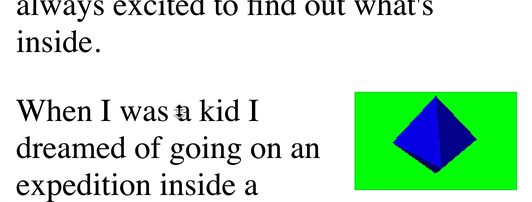
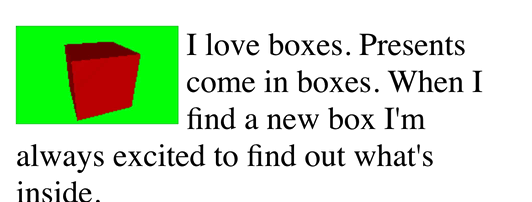
<canvas id="c"></canvas>
<p>
  <span id="box" class="diagram left"></span>
  I love boxes. Presents come in boxes.
  When I find a new box I'm always excited to find out what's inside.
</p>
<p>
  <span id="pyramid" class="diagram right"></span>
  When I was a kid I dreamed of going on an expedition inside a pyramid
  and finding a undiscovered tomb full of mummies and treasure.
</p>
Then we can setup the CSS maybe something like this
#c {
  position: fixed;
  left: 0;
  top: 0;
  width: 100%;
  height: 100%;
  display: block;
  z-index: -1;
}
.diagram {
  display: inline-block;
  width: 5em;
  height: 3em;
  border: 1px solid black;
}
.left {
  float: left;
  margin-right: .25em;
}
.right {
  float: right;
  margin-left: .25em;
}
We set the canvas to fill the screen and we set its z-index to
-1 to make it appear behind other elements. We also need to specify some kind of width and height for our virtual canvas elements since there is nothing inside to give them any size.
Now we'll make 2 scenes each with a light and a camera. To one scene we'll add a cube and to another a diamond.
function makeScene(elem) {
  const scene = new THREE.Scene();

  const fov = 45;
  const aspect = 2;  // the canvas default
  const near = 0.1;
  const far = 5;
  const camera = new THREE.PerspectiveCamera(fov, aspect, near, far);
  camera.position.z = 2;
  camera.position.set(0, 1, 2);
  camera.lookAt(0, 0, 0);

  {
    const color = 0xFFFFFF;
    const intensity = 1;
    const light = new THREE.DirectionalLight(color, intensity);
    light.position.set(-1, 2, 4);
    scene.add(light);
  }

  return {scene, camera, elem};
}

function setupScene1() {
  const sceneInfo = makeScene(document.querySelector('#box'));
  const geometry = new THREE.BoxGeometry(1, 1, 1);
  const material = new THREE.MeshPhongMaterial({color: 'red'});
  const mesh = new THREE.Mesh(geometry, material);
  sceneInfo.scene.add(mesh);
  sceneInfo.mesh = mesh;
  return sceneInfo;
}

function setupScene2() {
  const sceneInfo = makeScene(document.querySelector('#pyramid'));
  const radius = .8;
  const widthSegments = 4;
  const heightSegments = 2;
  const geometry = new THREE.SphereGeometry(radius, widthSegments, heightSegments);
  const material = new THREE.MeshPhongMaterial({
    color: 'blue',
    flatShading: true,
  });
  const mesh = new THREE.Mesh(geometry, material);
  sceneInfo.scene.add(mesh);
  sceneInfo.mesh = mesh;
  return sceneInfo;
}

const sceneInfo1 = setupScene1();
const sceneInfo2 = setupScene2();
And then we'll make a function to render each scene
only if the element is on the screen. We can tell THREE.js
to only render to part of the canvas by turning on the scissor
test with Renderer.setScissorTest and then setting both the scissor and the viewport with Renderer.setViewport and Renderer.setScissor.
function renderSceneInfo(sceneInfo) {
  const {scene, camera, elem} = sceneInfo;

  // get the viewport relative position of this element
  const {left, right, top, bottom, width, height} =
      elem.getBoundingClientRect();

  const isOffscreen =
      bottom < 0 ||
      top > renderer.domElement.clientHeight ||
      right < 0 ||
      left > renderer.domElement.clientWidth;

  if (isOffscreen) {
    return;
  }

  camera.aspect = width / height;
  camera.updateProjectionMatrix();

  const positiveYUpBottom = canvasRect.height - bottom;
  renderer.setScissor(left, positiveYUpBottom, width, height);
  renderer.setViewport(left, positiveYUpBottom, width, height);

  renderer.render(scene, camera);
}
And then our render function will just first clear the screen and then render each scene.
function render(time) {
  time *= 0.001;

  resizeRendererToDisplaySize(renderer);

  renderer.setScissorTest(false);
  renderer.clear(true, true);
  renderer.setScissorTest(true);

  sceneInfo1.mesh.rotation.y = time * .1;
  sceneInfo2.mesh.rotation.y = time * .1;

  renderSceneInfo(sceneInfo1);
  renderSceneInfo(sceneInfo2);

  requestAnimationFrame(render);
}
And here it is
You can see where the first <span> is there's a red cube and where the second span is there's a blue diamond.
Syncing up
The code above works but there is one minor issue. If your scenes are complicated or if for whatever reason it takes too long to render, the position of the scenes drawn into the canvas will lag behind the rest of the page.
If we give each area a border
.diagram {
  display: inline-block;
  width: 5em;
  height: 3em;
+  border: 1px solid black;
}
And we set the background of each scene
const scene = new THREE.Scene();
+scene.background = new THREE.Color('red');
And if we quickly scroll up and down we'll see the issue. Here's an animation of scrolling slowed down by 10x.
We can switch to a different method which has a different tradeoff. We'll switch the canvas's CSS from position: fixed to position: absolute.
#c {
-  position: fixed;
+  position: absolute;
Then we'll set the canvas's transform to move it so the top of the canvas is at the top of whatever part the page is currently scrolled to.
function render(time) {
  ...

  const transform = `translateY(${window.scrollY}px)`;
  renderer.domElement.style.transform = transform;
position: fixed kept the canvas from scrolling at all
while the rest of the page scrolled over it. position: absolute will let the canvas scroll with the rest of the page which means whatever we draw will stick with the page as it scrolls even if we're too slow to render. When we finally get a chance to render then we move the canvas so it matches where the page has been scrolled and then we re-render. This means only the edges of the window will show some un-rendered bits for a moment but the stuff in the middle of the page should match up and not slide. Here's a view of the results of the new method slowed down 10x.
Making it more Generic
Now that we've gotten multiple scenes working let's make this just slightly more generic.
We could make it so the main render function, the one managing the canvas, just has a list of elements and their associated render function. For each element it would check if the element is on screen and if so call the corresponding render function. In this way we'd have a generic system where individual scenes aren't really aware they are being rendered in some smaller space.
Here's the main render function
const sceneElements = [];
function addScene(elem, fn) {
  sceneElements.push({elem, fn});
}

function render(time) {
  time *= 0.001;

  resizeRendererToDisplaySize(renderer);

  renderer.setScissorTest(false);
  renderer.setClearColor(clearColor, 0);
  renderer.clear(true, true);
  renderer.setScissorTest(true);

  const transform = `translateY(${window.scrollY}px)`;
  renderer.domElement.style.transform = transform;

  for (const {elem, fn} of sceneElements) {
    // get the viewport relative position of this element
    const rect = elem.getBoundingClientRect();
    const {left, right, top, bottom, width, height} = rect;

    const isOffscreen =
        bottom < 0 ||
        top > renderer.domElement.clientHeight ||
        right < 0 ||
        left > renderer.domElement.clientWidth;

    if (!isOffscreen) {
      const positiveYUpBottom = renderer.domElement.clientHeight - bottom;
      renderer.setScissor(left, positiveYUpBottom, width, height);
      renderer.setViewport(left, positiveYUpBottom, width, height);

      fn(time, rect);
    }
  }

  requestAnimationFrame(render);
}
You can see it loops over sceneElements which it expects is an array of objects each of which have an elem and fn property.
It checks if the element is on screen. If it is it calls fn and passes it the current time and its rectangle.
Now the setup code for each scene just adds itself to the list of scenes
{
  const elem = document.querySelector('#box');
  const {scene, camera} = makeScene();
  const geometry = new THREE.BoxGeometry(1, 1, 1);
  const material = new THREE.MeshPhongMaterial({color: 'red'});
  const mesh = new THREE.Mesh(geometry, material);
  scene.add(mesh);
  addScene(elem, (time, rect) => {
    camera.aspect = rect.width / rect.height;
    camera.updateProjectionMatrix();
    mesh.rotation.y = time * .1;
    renderer.render(scene, camera);
  });
}

{
  const elem = document.querySelector('#pyramid');
  const {scene, camera} = makeScene();
  const radius = .8;
  const widthSegments = 4;
  const heightSegments = 2;
  const geometry = new THREE.SphereGeometry(radius, widthSegments, heightSegments);
  const material = new THREE.MeshPhongMaterial({
    color: 'blue',
    flatShading: true,
  });
  const mesh = new THREE.Mesh(geometry, material);
  scene.add(mesh);
  addScene(elem, (time, rect) => {
    camera.aspect = rect.width / rect.height;
    camera.updateProjectionMatrix();
    mesh.rotation.y = time * .1;
    renderer.render(scene, camera);
  });
}
With that we no longer need sceneInfo1 and sceneInfo2 and the code that was rotating the meshes is now specific to each scene.
Using HTML Dataset
One last even more generic thing we can do is use HTML dataset. This is a way to add your own data to an HTML element. Instead of using id="..." we'll use data-diagram="..." like this
<canvas id="c"></canvas>
<p>
-  <span id="box" class="diagram left"></span>
+  <span data-diagram="box" class="left"></span>
  I love boxes. Presents come in boxes.
  When I find a new box I'm always excited to find out what's inside.
</p>
<p>
-  <span id="pyramid" class="diagram left"></span>
+  <span data-diagram="pyramid" class="right"></span>
  When I was a kid I dreamed of going on an expedition inside a pyramid
  and finding a undiscovered tomb full of mummies and treasure.
</p>
We can them change the CSS selector to select for that
-.diagram
+*[data-diagram] {
  display: inline-block;
  width: 5em;
  height: 3em;
}
We'll change the scene setup code to just be a map of names to scene initialization functions that return a scene render function.
const sceneInitFunctionsByName = {
  'box': () => {
    const {scene, camera} = makeScene();
    const geometry = new THREE.BoxGeometry(1, 1, 1);
    const material = new THREE.MeshPhongMaterial({color: 'red'});
    const mesh = new THREE.Mesh(geometry, material);
    scene.add(mesh);
    return (time, rect) => {
      mesh.rotation.y = time * .1;
      camera.aspect = rect.width / rect.height;
      camera.updateProjectionMatrix();
      renderer.render(scene, camera);
    };
  },
  'pyramid': () => {
    const {scene, camera} = makeScene();
    const radius = .8;
    const widthSegments = 4;
    const heightSegments = 2;
    const geometry = new THREE.SphereGeometry(radius, widthSegments, heightSegments);
    const material = new THREE.MeshPhongMaterial({
      color: 'blue',
      flatShading: true,
    });
    const mesh = new THREE.Mesh(geometry, material);
    scene.add(mesh);
    return (time, rect) => {
      mesh.rotation.y = time * .1;
      camera.aspect = rect.width / rect.height;
      camera.updateProjectionMatrix();
      renderer.render(scene, camera);
    };
  },
};
And to init we can just use querySelectorAll to find all the diagrams and call the corresponding init function for that diagram.
document.querySelectorAll('[data-diagram]').forEach((elem) => {
  const sceneName = elem.dataset.diagram;
  const sceneInitFunction = sceneInitFunctionsByName[sceneName];
  const sceneRenderFunction = sceneInitFunction(elem);
  addScene(elem, sceneRenderFunction);
});
No change to the visuals but the code is even more generic.
Adding Controls to each element
Adding interactively, for example a TrackballControls is just as easy. First we add the script for the control.
import {TrackballControls} from 'three/addons/controls/TrackballControls.js';
And then we can add a TrackballControls to each scene passing in the element associated with that scene.
-function makeScene() {
+function makeScene(elem) {
  const scene = new THREE.Scene();

  const fov = 45;
  const aspect = 2;  // the canvas default
  const near = 0.1;
  const far = 5;
  const camera = new THREE.PerspectiveCamera(fov, aspect, near, far);
  camera.position.set(0, 1, 2);
  camera.lookAt(0, 0, 0);
+  scene.add(camera);

+  const controls = new TrackballControls(camera, elem);
+  controls.noZoom = true;
+  controls.noPan = true;

  {
    const color = 0xFFFFFF;
    const intensity = 1;
    const light = new THREE.DirectionalLight(color, intensity);
    light.position.set(-1, 2, 4);
-    scene.add(light);
+    camera.add(light);
  }

-  return {scene, camera};
+ return {scene, camera, controls};
}
You'll notice we added the camera to the scene and the light to the camera. This makes the light relative to the camera. Since the TrackballControls are moving the camera this is probably what we want. It keeps the light shining on the side of the object we are looking at.
We need up update those controls in our render functions
const sceneInitFunctionsByName = {
- 'box': () => {
-    const {scene, camera} = makeScene();
+ 'box': (elem) => {
+    const {scene, camera, controls} = makeScene(elem);
    const geometry = new THREE.BoxGeometry(1, 1, 1);
    const material = new THREE.MeshPhongMaterial({color: 'red'});
    const mesh = new THREE.Mesh(geometry, material);
    scene.add(mesh);
    return (time, rect) => {
      mesh.rotation.y = time * .1;
      camera.aspect = rect.width / rect.height;
      camera.updateProjectionMatrix();
+      controls.handleResize();
+      controls.update();
      renderer.render(scene, camera);
    };
  },
-  'pyramid': () => {
-    const {scene, camera} = makeScene();
+  'pyramid': (elem) => {
+    const {scene, camera, controls} = makeScene(elem);
    const radius = .8;
    const widthSegments = 4;
    const heightSegments = 2;
    const geometry = new THREE.SphereGeometry(radius, widthSegments, heightSegments);
    const material = new THREE.MeshPhongMaterial({
      color: 'blue',
      flatShading: true,
    });
    const mesh = new THREE.Mesh(geometry, material);
    scene.add(mesh);
    return (time, rect) => {
      mesh.rotation.y = time * .1;
      camera.aspect = rect.width / rect.height;
      camera.updateProjectionMatrix();
+      controls.handleResize();
+      controls.update();
      renderer.render(scene, camera);
    };
  },
};
And now if you drag the objects they'll rotate.
These techniques are used on this site itself. In particular the article about primitives and the article about materials use this technique to add the various examples throughout the article.
One more solution would be to render to an off screen canvas and copy the result to a 2D canvas at each element. The advantage to this solution is there is no limit on how you can composite each separate area. With the previous solution we and a single canvas in the background. With this solution we have normal HTML elements.
The disadvantage is it's slower because a copy has to happen for each area. How much slower depends on the browser and the GPU.
The changes needed are pretty small
First we'll change HTML as we no longer need a canvas in the page
<body>
-  <canvas id="c"></canvas>
  ...
</body>
then we'll change the CSS
-#c {
-  position: absolute;
-  left: 0;
-  top: 0;
-  width: 100%;
-  height: 100%;
-  display: block;
-  z-index: -1;
-}
canvas {
  width: 100%;
  height: 100%;
  display: block;
}
*[data-diagram] {
  display: inline-block;
  width: 5em;
  height: 3em;
}
We've made all canvases fill their container.
Now let's change the JavaScript. First we no longer look up the canvas. Instead we create one. We also just turn on the scissor test at the beginning.
function main() {
-  const canvas = document.querySelector('#c');
+  const canvas = document.createElement('canvas');
  const renderer = new THREE.WebGLRenderer({antialias: true, canvas, alpha: true});
+  renderer.setScissorTest(true);

  ...
Then for each scene we create a 2D rendering context and append its canvas to the element for that scene
const sceneElements = [];
function addScene(elem, fn) {
+  const ctx = document.createElement('canvas').getContext('2d');
+  elem.appendChild(ctx.canvas);
-  sceneElements.push({elem, fn});
+  sceneElements.push({elem, ctx, fn});
}
Then when rendering, if the renderer's canvas is not big enough to render this area we increase its size. As well if this area's canvas is the wrong size we change its size. Finally we set the scissor and viewport, render the scene for this area, then copy the result to the area's canvas.
function render(time) {
  time *= 0.001;

-  resizeRendererToDisplaySize(renderer);
-
-  renderer.setScissorTest(false);
-  renderer.setClearColor(clearColor, 0);
-  renderer.clear(true, true);
-  renderer.setScissorTest(true);
-
-  const transform = `translateY(${window.scrollY}px)`;
-  renderer.domElement.style.transform = transform;

-  for (const {elem, fn} of sceneElements) {
+  for (const {elem, fn, ctx} of sceneElements) {
    // get the viewport relative position of this element
    const rect = elem.getBoundingClientRect();
    const {left, right, top, bottom, width, height} = rect;
+    const rendererCanvas = renderer.domElement;

    const isOffscreen =
        bottom < 0 ||
-        top > renderer.domElement.clientHeight ||
+        top > window.innerHeight ||
        right < 0 ||
-        left > renderer.domElement.clientWidth;
+        left > window.innerWidth;

    if (!isOffscreen) {
-      const positiveYUpBottom = renderer.domElement.clientHeight - bottom;
-      renderer.setScissor(left, positiveYUpBottom, width, height);
-      renderer.setViewport(left, positiveYUpBottom, width, height);

+      // make sure the renderer's canvas is big enough
+      if (rendererCanvas.width < width || rendererCanvas.height < height) {
+        renderer.setSize(width, height, false);
+      }
+
+      // make sure the canvas for this area is the same size as the area
+      if (ctx.canvas.width !== width || ctx.canvas.height !== height) {
+        ctx.canvas.width = width;
+        ctx.canvas.height = height;
+      }
+
+      renderer.setScissor(0, 0, width, height);
+      renderer.setViewport(0, 0, width, height);

      fn(time, rect);

+      // copy the rendered scene to this element's canvas
+      ctx.globalCompositeOperation = 'copy';
+      ctx.drawImage(
+          rendererCanvas,
+          0, rendererCanvas.height - height, width, height,  // src rect
+          0, 0, width, height);                              // dst rect
    }
  }

  requestAnimationFrame(render);
}
The result looks the same
One other advantage to this solution is you could potentially use
OffscreenCanvas
to render from a web worker and still use this technique.